
Start with a plan.
A kitchen remodel is a sequence of decisions. Make the expensive ones before demolition.
Choose your scope
Cabinet replacement keeps the existing layout. A full remodel may change walls, utilities, appliances, flooring and countertops. Write down exactly what stays and what changes; a cabinet quote alone is not a complete kitchen budget.
Decide what you will do
Choose DIY tasks you can perform safely, the tasks you want to practice at the workshop, and the tasks you will hire out. Plan for a capable helper and lifting equipment. Large wall and tall cabinets are not solo lifts.
Follow the project sequence
Measure and document > approve layout and appliance specifications > confirm budget and applicable permits > order and inspect materials > prepare room and complete trade work > assemble and secure cabinets > template countertops > finish and reconnect > final checks.
Keep the kitchen usable
Set up a temporary food-preparation area outside the work zone. Plan drinking water, meals, washing dishes, refrigerator access, dust containment, disposal and a safe route through the home. Schedule by milestones rather than promising a weekend finish.
Measure in layers.
Use overall dimensions, opening dimensions and vertical dimensions together.
Example wall elevation
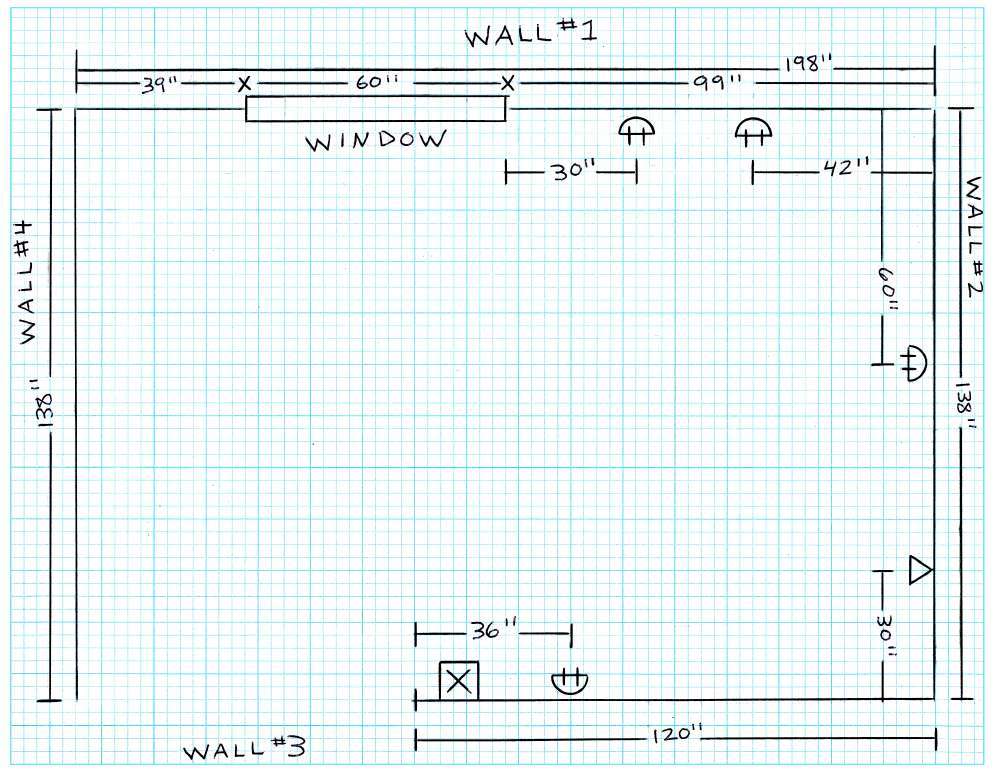
Use the drawing correctly
The example shows a 144-inch wall split into 36 inches of wall, a 48-inch window opening, and 60 inches of wall. Confirm both the overall dimension and each segment. Record whether you measured to trim or opening edges; use the same reference consistently.
Then measure vertically
Record floor to sill, opening height and opening top to ceiling. Mark soffits and trim separately. Note wall bows, floor high points and utility locations on your own sketch.
Measure before you buy.
Use inches consistently. Label every wall and every dimension.
Draw the room
Sketch a top-down plan. Label walls A, B, C and D. Record overall lengths, ceiling height in several places, doors, windows, soffits, trim and fixed obstructions. Measure each opening from the same corner; include trim, sill height and swing direction.
Map the utilities
Record locations of water supplies, drain, outlets, switches, gas connection and vent route. Use a corner and the floor as reference points. Photograph each wall straight on. Do not assume a pipe or wire stays in one straight line inside a wall.
Check the existing surfaces
Use a long level or laser and straightedge to identify floor high points, wall bows and out-of-plumb areas. Note corners that are not square. Dimensions taken at one height alone can miss a tight spot higher up.
Verify the whole run
Measure at base-cabinet and wall-cabinet heights and check diagonals. Add the cabinet widths, appliance openings, fillers, end panels and installation allowances; compare the sum with the usable wall. Ask for a layout review before ordering.
Your measurement worksheet.
Print this page. Use one row per wall segment, opening or obstruction.
Project details
Name: __________________________________ Date: ______________
Address: ___________________________________________________
Cabinet line / finish: __________________________________________
Measurement units: __________ Measured by: ____________________
Wall and opening schedule
| Wall / item | Width | Height / offset | Notes |
|---|---|---|---|
| A | ________ | ________ | ________ |
| B | ________ | ________ | ________ |
| C | ________ | ________ | ________ |
| D | ________ | ________ | ________ |
| Window | ________ | ________ | ________ |
| Door | ________ | ________ | ________ |
Appliance and utility record
Refrigerator model / opening: __________________________________
Range or cooktop model / opening: ______________________________
Dishwasher model / opening: ___________________________________
Sink model / base requirement: _________________________________
Vent route / utility notes: ______________________________________
Room sketch
Use the grid in the printable PDF to sketch your walls, openings and utilities.
Sketch your kitchen.
Print at actual size (100%). Each grid square represents 6 inches.
Room plan / wall labels / doors / windows / utilities
Print the full-page planning grid in the PDF guide at 100% actual size. Each square represents 6 inches. Label walls, openings, appliances and fixed utilities.
Record dimensions in inches and label fixed obstructions. A 6-inch grid is for planning, not field-measurement accuracy.
Make the layout work.
A cabinet that fits on paper still needs room to open and function.
Use actual appliance specifications
Choose model numbers before final approval. Use each appliance installation sheet for opening size, ventilation, door swing, utilities and required clearances. Nominal appliance width is not the full installation requirement. Check refrigerator depth and dishwasher removal clearance.
Plan corners and fillers
Allow doors, drawers and pullouts to clear walls, casing and neighboring handles. Confirm blind-corner access, hinge side and manufacturer filler requirements. Include finished ends, refrigerator panels, toe kicks and crown in the plan.
Mock up circulation
Tape proposed cabinet and island footprints on the floor, including countertop overhangs. Test walking, appliance access and conflicting door swings. Confirm the layout with a designer where space is tight or accessibility matters; no single aisle dimension solves every kitchen.
Coordinate the other finishes
Agree on countertop thickness, backsplash termination, sink type and lighting before ordering. Confirm how flooring and underlayment affect cabinet height, toe kicks and appliance openings. Follow the flooring instructions, especially for floating floors; avoid trapping them beneath fixed cabinets.
Budget the whole kitchen.
Separate cabinet cost from the cost of completing the room.
Cabinet package
Cabinet boxes, doors, drawers, shelves, hinges, fillers, end panels, toe kicks, molding, trim, handles, delivery and tax. Confirm what is included in writing. Ask about lead times, damage reporting and return rules before paying.
Other project costs
Demolition and disposal; wall and floor repairs; paint; flooring; countertops and supports; backsplash; sink and faucet; appliances; lighting; plumbing, electrical and gas work; permit/inspection costs if applicable; tools and rentals; temporary kitchen needs.
Create your reserve
Choose a separate contingency based on the uncertainty in your room. Hidden damage and changes to utilities can alter the scope. Keep contingency available instead of using it to expand the initial cabinet order.
Compare quotes consistently
Compare the same cabinet list, construction, finish, accessories, delivery, taxes and exclusions. Record who owns measuring, assembly, installation, countertop coordination and damaged-part claims. DIY reduces some labor spending but adds your own time, tools and coordination.
Your budget and order checklist.
Keep this with the approved layout and cabinet schedule.
Budget worksheet
Enter planned amounts to total your budget. Values stay on this page and are not sent to AniPros.
Before order approval
Roles and dates
Layout approved by / date: _____________________________________
Field dimensions verified by / date: ______________________________
Installer or DIY lead: __________________________________________
Trade contact(s): _____________________________________________
Supplier-confirmed delivery: __________ Countertop contact: ________
Tools and supplies.
Buy, borrow or rent to suit your actual cabinet system.
Measure and lay out
Tape measure; pencil; painter's tape; long level or laser with level; framing square; straightedge; stud finder; printed layout and appliance specification sheets.
Assemble and adjust
Drill/driver with clutch; correct driver bits; manufacturer-sized drill and countersink bits; hand screwdrivers; padded cabinet clamps; rubber mallet only if specified; soft work surface; labeled containers for hardware.
Fit and support
Manufacturer-approved shims, attachment screws and cabinet-to-cabinet screws; stable workbench; cutting tools appropriate to the panels and your skill; scribing tool; hardware jig; secure step platform; cabinet lift or properly rated temporary support; capable helper.
Protect and clean
Eye and hearing protection, suitable dust controls, appropriate respiratory protection for the material/task, floor protection, work lights and vacuum. Use gloves for handling sharp edges, following tool guidance around moving blades. Keep children and pets out of the work area.
Read the construction details.
Door style, finish, box construction and overlay are separate decisions.
Framed or frameless
Framed cabinets have a face frame at the front of the box. Frameless cabinets attach hardware to the cabinet sides. Interior openings, assembly methods and joining details differ; ask which construction is being quoted.
Full overlay, partial overlay or inset
Overlay describes how doors relate to the cabinet opening, not the door profile. Full overlay covers most of the front. Partial overlay leaves more frame exposed. Inset doors fit within the frame. Confirm reveals, clearances and hardware for the selected product.
Painted or wood-look finish
A painted look and a wood look can use different materials and finishes. Confirm the door substrate, actual species or decorative surface, finish sheen, grain direction and cleaning instructions. Do not infer material from a color name or illustration.
Keep your selection consistent
Record the cabinet line privately with your quote, plus the approved sample, door style, finish, overlay, box construction and hardware. If using different sources, approve physical samples together; similarly named colors may not match.
CHAPTER 11
Match the cabinet to its job.
Use the correctly labeled outline examples below. Each listed size belongs to one framed reference system.
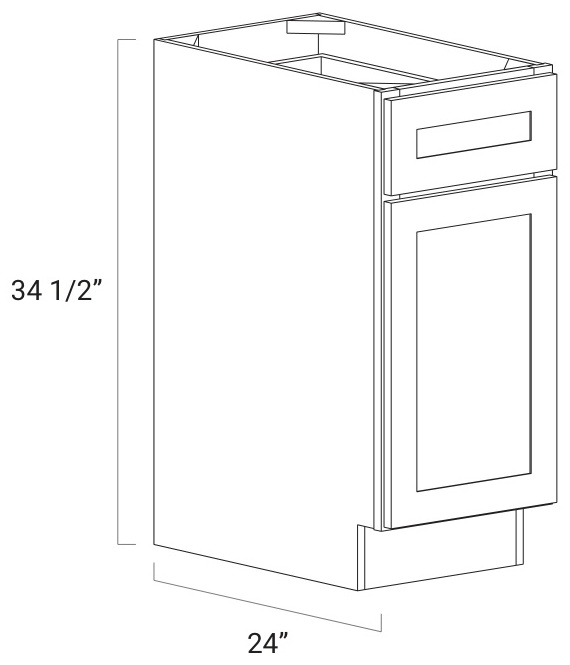
T01
Single-door base
- Reference dimensions
- 12, 15, 18 or 21 W × 34 1/2 H × 24 D in.
One drawer above a door; One adjustable shelf
Use for shelf storage; locate pull-outs only after checking the clear frame opening.
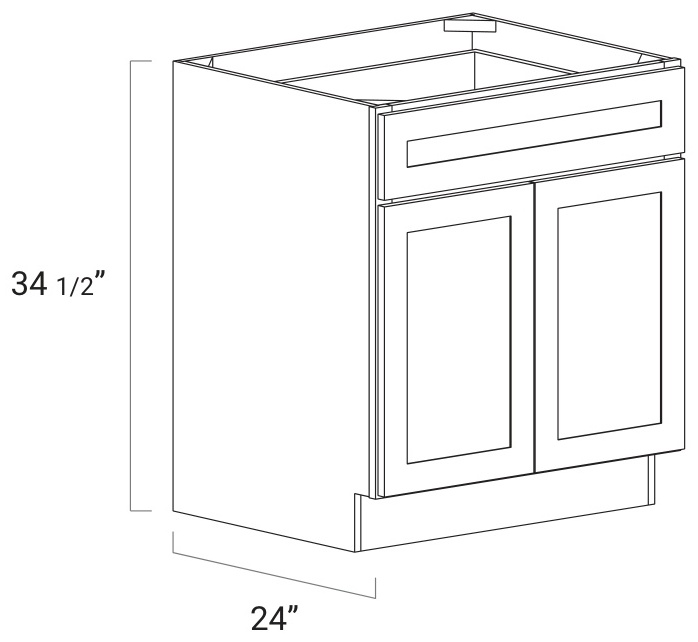
T02
Double-door base
- Reference dimensions
- 24, 27, 30, 33 or 36 W × 34 1/2 H × 24 D in.
Wide shelf storage; One adjustable shelf
Specify wider 39/42-inch variants separately because the catalog changes the drawer arrangement.
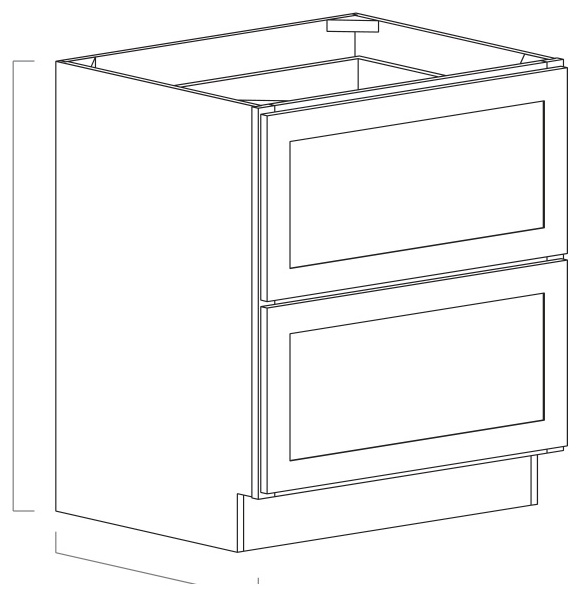
T03
Two-drawer base
- Reference dimensions
- 30, 33 or 36 W × 34 1/2 H × 24 D in.
Two deep drawers; Full-extension glides
Place cookware near the cooking zone. Check usable interior dimensions before buying dividers.
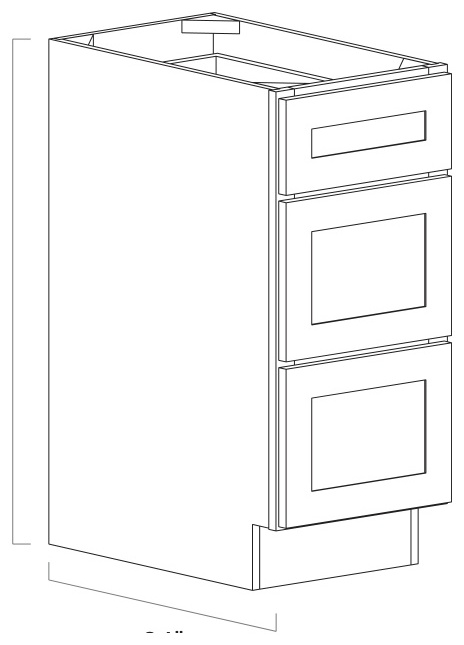
T04
Three-drawer base
- Reference dimensions
- 12, 15, 18, 21, 24, 27, 30, 33 or 36 W × 34 1/2 H × 24 D in.
Shallow top drawer and two deeper fronts; Top front aligns with standard base cabinetry
Separate utensils from larger cookware; interior drawer capacity is smaller than outside box dimensions.
Plan the tricky pieces.
Corners, tall units and finishing pieces need room in the plan.
Specialty and finishing pieces
Use the verified cabinet reference for correct outlines, size variants and fit notes.
Open cabinet type referenceChoose a door profile.
Compare Shaker, slim Shaker, slab, raised-panel and detailed-panel options using actual supplier photography.
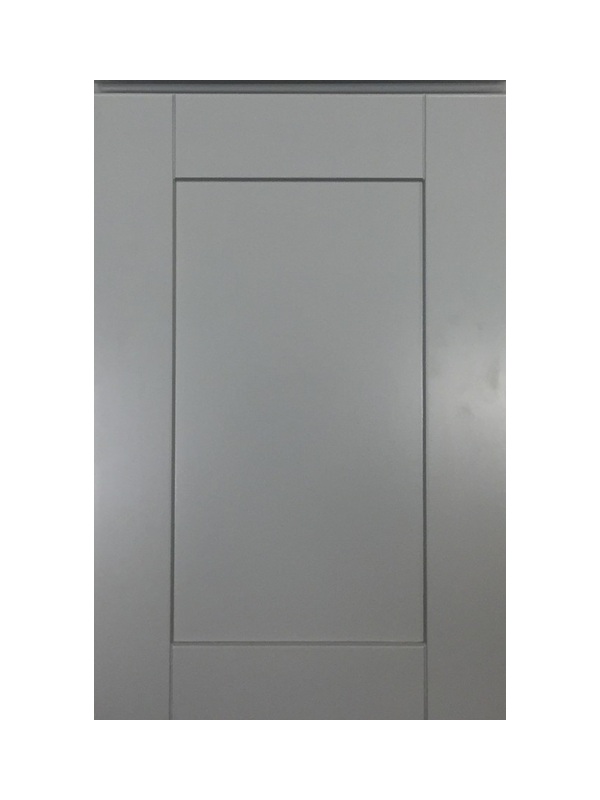

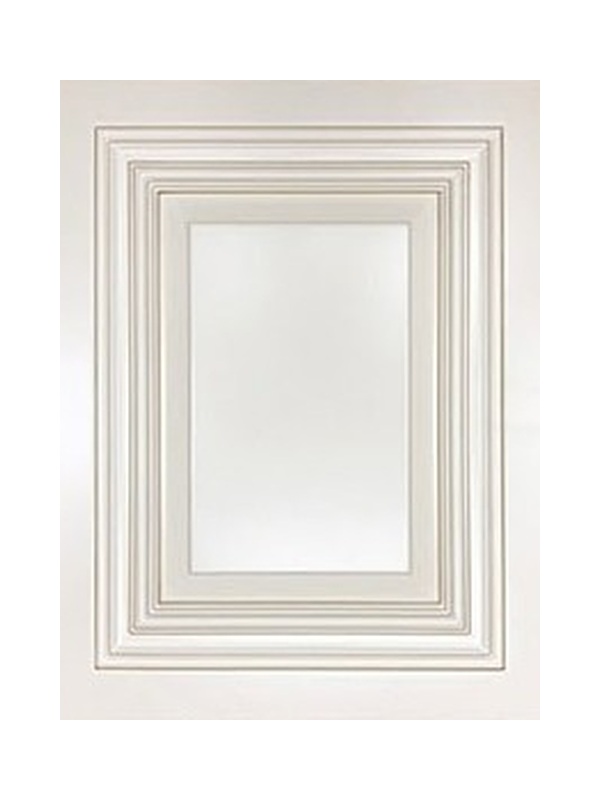
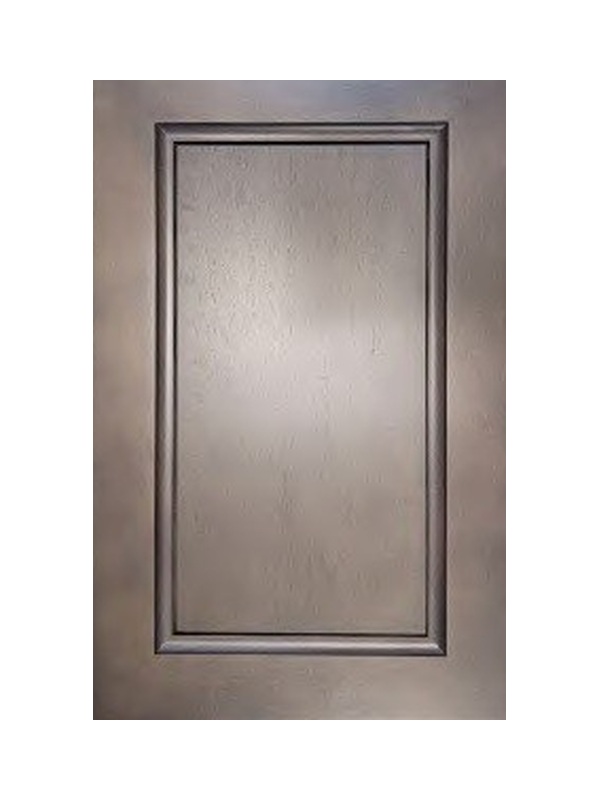
Choose by selection ID, then confirm the actual product and a physical sample before ordering.
Choose the finish in context.
Search whites, wood tones, grays, greens, blues and blacks. Similar names do not guarantee matching materials or finishes.
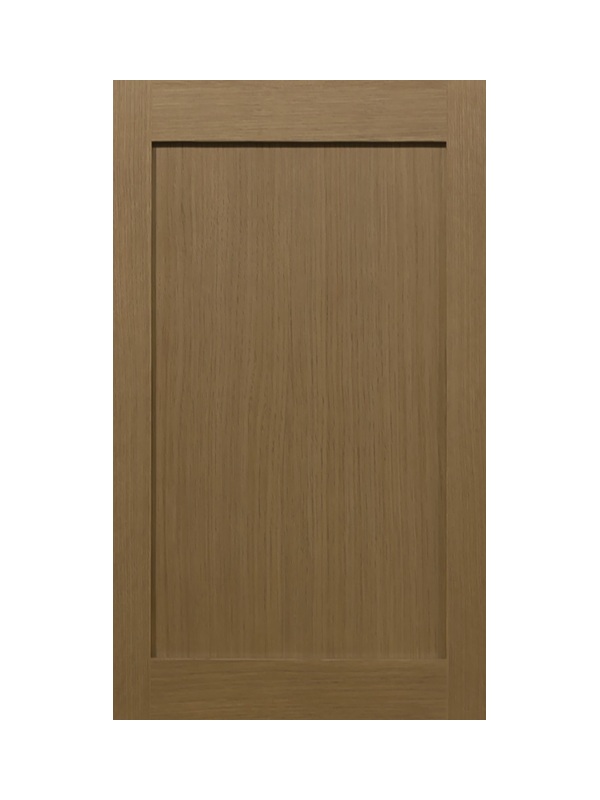
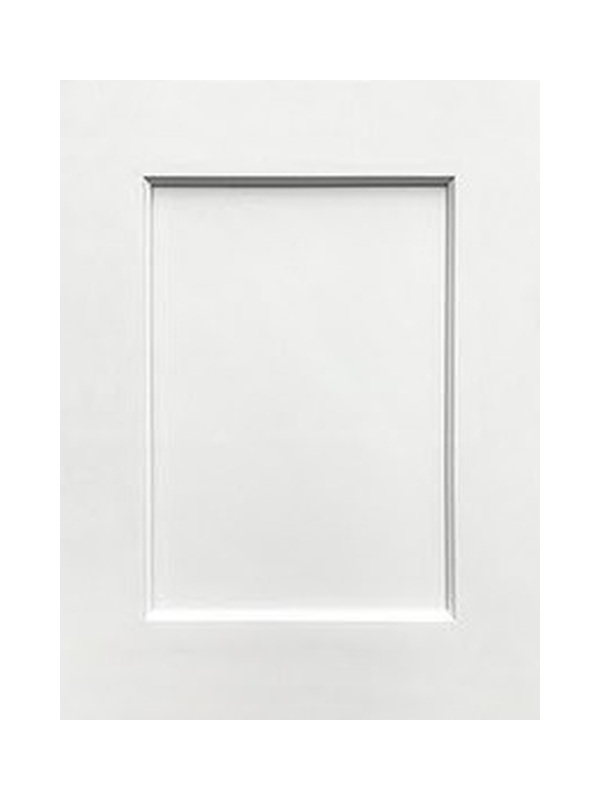
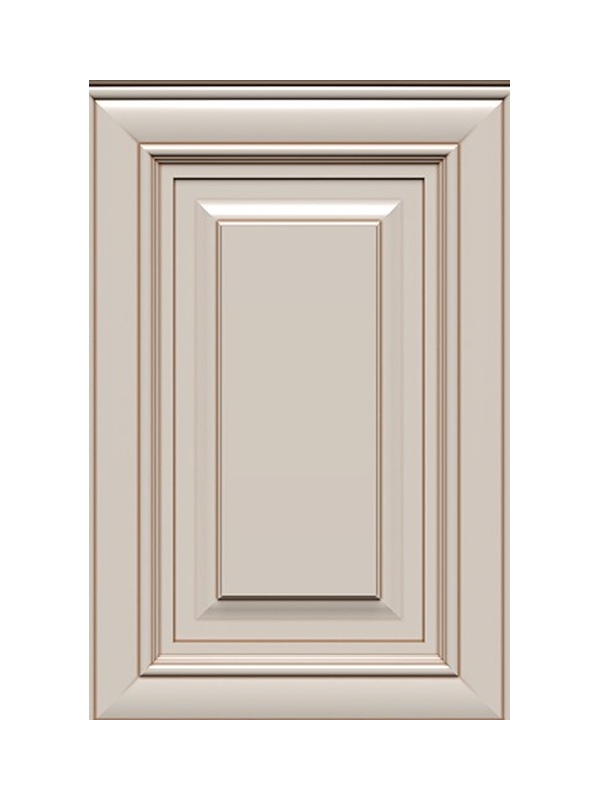
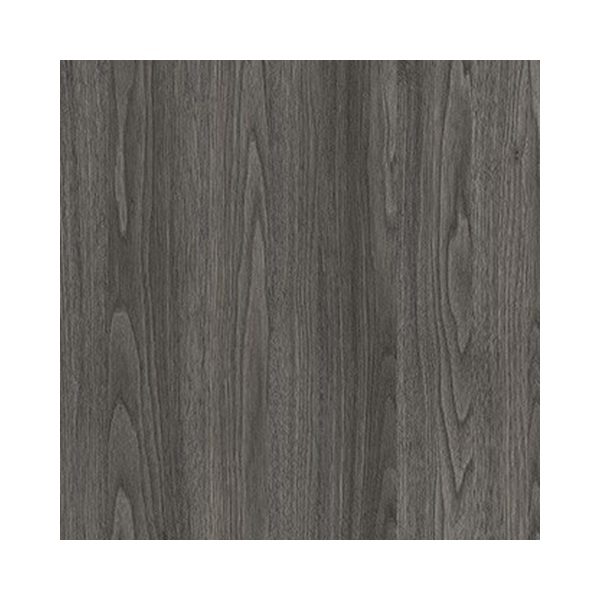
Choose by selection ID, then confirm the actual product and a physical sample before ordering.
Your cabinet selection record.
Bring this page, room photos and appliance model sheets to AniPros.
Choose a look
Door style: __________________________________________________
Perimeter color / finish: ________________________________________
Island color / finish: ___________________________________________
Preferred sheen / grain direction: ________________________________
Confirm the actual product
Quote / selection ID: __________________________________________
Physical sample approved / date: ________________________________
Box construction / overlay: _____________________________________
Door material / finish surface: __________________________________
Hinges / slides / pulls: _________________________________________
Check availability and compatibility
Style and finish combination confirmed: __________________________
All matching panels / trim available: ______________________________
Lead time / delivery confirmed: __________________________________
Any substitutions approved in writing: ____________________________
Order only after review
Confirm cabinet IDs, quantities, dimensions, appliance openings, fillers, finished ends, toe kicks, moldings, mounting components and included hardware against the approved layout.
Receive and check the order.
Discover missing or damaged parts before the room is taken apart.
Inspect and document
Compare every carton with the order and cabinet schedule. Photograph packaging and visible damage; follow delivery paperwork and the supplier's claim deadlines. Check cabinet size, finish, hinge side, doors, panels and accessories. Keep labels, receipts and installation instructions.
Store correctly
Keep components indoors, dry and protected as the cabinet supplier directs. Support long panels so they cannot bend or fall. Keep heavy boxes low and walkways clear. Organize by the cabinet ID on the approved layout.
Check the small parts
Count assembly hardware, shelf supports, hinges, drawer slides and mounting parts. Confirm which wall screws or rails are supplied and which must be purchased for the actual wall construction.
Use a readiness gate
Do not schedule demolition solely because boxes arrived. Verify the layout, all critical parts, appliance dimensions, trade arrangements and countertop process. Resolve shortages or damaged structural pieces with the supplier before assembly or mounting.
Prepare the room.
The new cabinets need sound, dry surfaces and a verified attachment plan.
Before removing anything
Document the old layout and protect adjacent rooms. Arrange qualified trade professionals for utility disconnections and reconnections. Never cut or disconnect a gas line yourself. Confirm circuits are safely isolated before work that can disturb wiring.
Remove with support
Remove loose contents, shelves, doors and drawers. Have heavy countertops safely removed. Support wall cabinets before loosening fasteners and work with a helper. Do not pry on a cabinet while someone relies on its mounting to hold it up.
Repair and verify
Resolve leaks, moisture damage and unsafe conditions before covering them. Confirm walls can carry the cabinets and identify the actual framing or other structure. Coordinate blocking and utility rough-ins before walls are closed. Complete required inspections before concealment.
Lay out reference lines
Establish a level reference from the floor high point, accounting for final floor buildup and the planned cabinet/countertop heights. Mark cabinet IDs and verified structural attachment points. Rail systems use their own height rules; do not copy another brand's dimensions.
Assemble one cabinet first.
Ready-to-assemble systems differ. Follow the manual for your exact model.
01 / Identify and dry-check
Match the box ID to the room plan. Read the complete assembly sheet, identify top/bottom/front/back and count hardware. Work on a flat padded surface. Inspect panels before joining them.
02 / Follow the joint sequence
Fit parts in the specified order. Use the supplied cams, dowels, brackets or screws as instructed. Add adhesive only where the manufacturer calls for it; some joints must remain adjustable or removable. Use controlled driver torque.
03 / Square and secure
Before final tightening, compare the two corner-to-corner diagonals and check the box with a square. Fit and fasten the back exactly as directed; backs may contribute to rigidity. Do not force a twisted box into shape using wall screws.
04 / Test and label
Check that the box is stable and joints are seated. Test hardware placement according to the manual. Label the cabinet ID and keep doors/drawers with their original cabinet. Remove or delay fitting them for mounting when the cabinet instructions permit.
Install wall cabinets.
Use the cabinet manufacturer's attachment instructions and a competent helper.
01 / Confirm the support
Identify the wall construction and verify framing/blocking locations. Confirm screw type, quantity, spacing, embedment and mounting zones for the actual product. Masonry or metal framing requires a designed attachment approach, not a guess at a different anchor.
02 / Position safely
Follow the system's installation order. Wall cabinets are often installed before bases for access. Use a cabinet lift or correctly secured, rated temporary support with a helper. Check for concealed utilities before attaching any ledger or rail.
03 / Align and attach
Hold the cabinet level, plumb and aligned to the layout. Shim at attachment locations as the manual directs. Predrill where required; fasten only through approved structural mounting areas into verified support. Do not rely on drywall or a thin back panel.
04 / Join and recheck
Clamp neighboring cabinets with padded clamps and align faces. Join with the specified cabinet joining fasteners; these do not replace wall attachment. Recheck alignment and mounting before removing temporary support. Keep cabinets unloaded until attachment is fully verified.
Install bases and tall units.
A straight, level cabinet run starts at the highest point of the floor.
01 / Dry fit the full run
Confirm the starting point, often the corner, using the approved plan. Check appliance openings, fillers, end-panel thicknesses and access. Mark utility penetrations from verified measurements; avoid cutting structural rails or drawer-slide locations.
02 / Level without twisting
Support the cabinet at the manufacturer's bearing points. Use shims or adjustable legs as specified to bring it to the reference height. Check side-to-side, front-to-back and face plumb. Use a long straightedge across adjoining tops.
03 / Secure and join
Fasten into verified structural support using the required mounting locations and hardware. Shim behind fasteners where specified so tightening does not bow the cabinet. Join neighboring boxes with the correct fasteners and keep faces aligned.
04 / Protect the next steps
Anchor tall cabinets against tipping before loading. Use the specified island anchoring system and obtain slab/utility clearance before floor drilling. Recheck appliance openings and countertop support needs. Have the fabricator confirm template readiness before measurement.
Finish and inspect.
Slow down for the visible details and the final function checks.
Fit panels and trim
Measure and scribe fillers or finished panels carefully; test fit before final cuts. Leave manufacturer-required movement or fitting allowances. Use the designated trim fasteners, without cutting into structural mounting zones or appliance clearances.
Adjust doors and drawers
Install and tune hinges and slides in the specified sequence. Adjust in small increments and test full travel. Align door and drawer gaps before drilling for handles. Test a hardware jig on scrap and use a backer to reduce tear-out.
Complete the room
Coordinate countertop installation, backsplash and qualified utility reconnections in the right order. Confirm sink support and sealing details with the relevant manufacturers. Make sure the dishwasher can be installed and later removed without trapping it behind flooring.
Check and care
Test doors, drawers, pullouts, appliances and walking routes. Verify shelf supports and mounting completion before loading. Clean using the finish manufacturer's guidance, remove standing water promptly and keep order records, paint/finish codes and warranty documents.
Avoid the expensive mistakes.
Use these checks before a small error becomes a replacement order.
Wrong fit
Missed filler, appliance swing or end panel: recheck the full run and all moving parts before approval. An out-of-square corner: document it and plan the fitting detail rather than forcing standard boxes against it.
Uneven doors or drawers
First check that the box is square, level and not twisted by attachment screws. Then adjust hinges and slides using the product manual. Do not keep tightening adjustment screws to hide a distorted cabinet.
A bowed run or gaps at the wall
Recheck high points, shims and fastening locations. An uneven wall needs the correct fitting solution. Do not draw a straight cabinet into a bowed wall by overtightening screws.
Leaks or movement
Stop using affected cabinets, protect the area and obtain qualified help. Repair the cause before replacing damaged material. A workshop does not replace structural assessment, a utility trade or the cabinet maker's instructions.
Workshop and final checklist.
Use the workshop to practice, then use the checklist at home.
Questions to bring
Which parts of my cabinet carry the mounting loads? Which fasteners and supports fit my wall? Where do I need fillers? What installation sequence fits my layout? How do I adjust my hinges and slides? Which steps should I hire out?
Before the workshop
Before using the kitchen
Your next step
Call (928) 408-2038 or email remodel@anipros.com to discuss your cabinet order and workshop availability. Dates and attendance are confirmed directly by AniPros. Ask which demonstration materials to bring; do not transport heavy cabinets without instructions.
Your product documents.
Keep the instructions for the exact cabinet system you purchase with this guide.
Assembly and installation
Obtain the full assembly manual, structural attachment details, screw requirements, mounting zones and any rail instructions for the chosen cabinet line. Confirm wall construction and required support before mounting. General examples from another system are not a substitute.
Appliances, flooring and countertops
Keep the actual appliance model sheets, sink support requirements, flooring installation instructions, countertop support specifications and care guides with the approved room plan.
Older-home renovation
For pre-1978 painted surfaces, review the U.S. Environmental Protection Agency's lead-safe renovation guidance and arrange appropriate assessment before disturbance.
EPA: Lead-Safe Renovations for DIYers
About the visual selection pages
Door profiles and finish samples are original planning illustrations with descriptive names. They are not a manufacturer catalog, a guaranteed stock list or an exact color match. Ask AniPros to confirm available products, samples, sizes, materials, terms and pricing.
A & I Builders LLC dba AniPros | ROC 312737
(928) 408-2038 | remodel@anipros.com | anipros.com
CHAPTER 25
Countertops, sinks, handles and optional help.
Finish the product list and decide which tasks you want to handle yourself.
BATHROOM PLANNING
Plan your bathroom as a complete system.
Coordinate the vanity, top, sink, faucet, drain, mirror and storage before approving the order.